The Team page is where you add people and decide what they can see and what their time is worth.
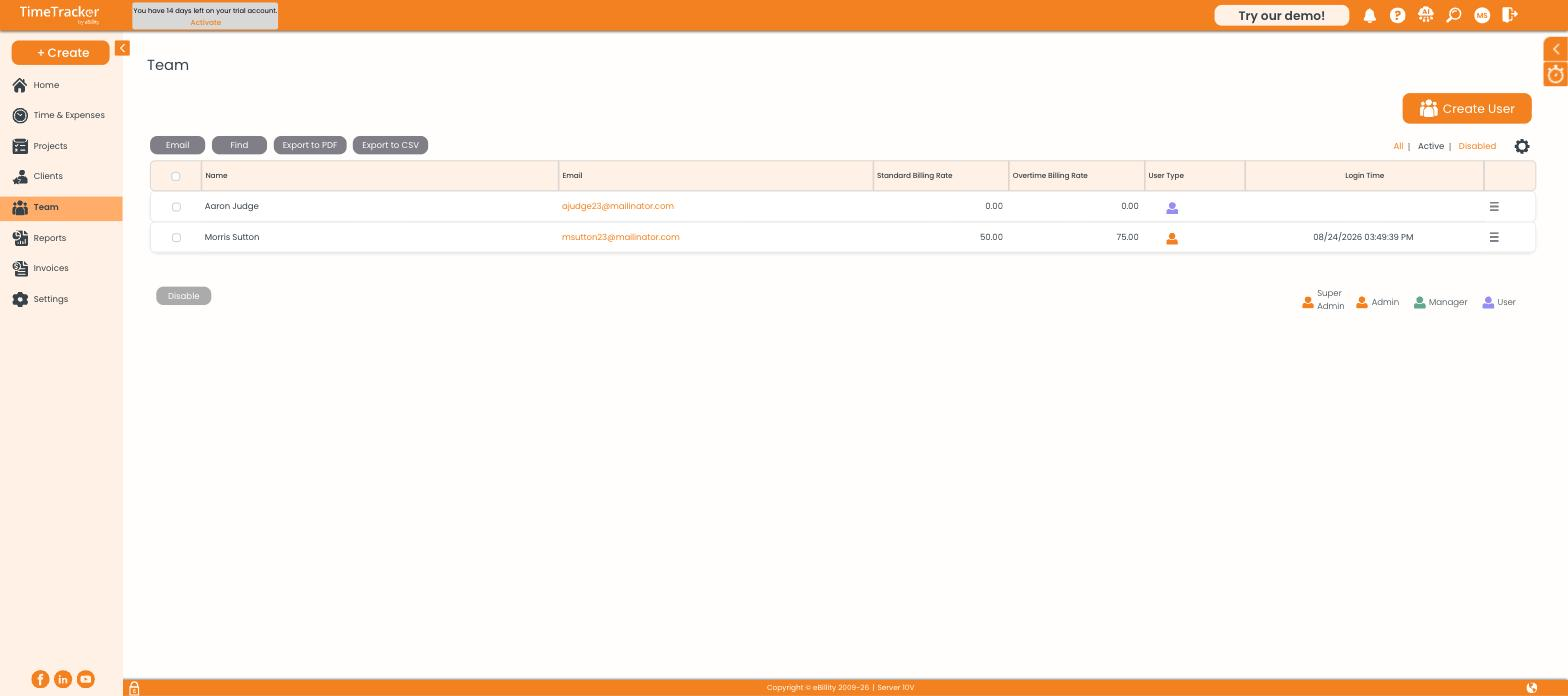
The team list, with standard and overtime billing rates and a role icon for each person.
Adding someone
- Go to Team and click Create User.
- Enter their name and email address — the email is how they sign in.
- Set their Standard Billing Rate and Overtime Billing Rate.
- Choose their role.
- Save. They receive an email invitation to set their own password.
Roles
The icons in the User Type column show each person's role, with a legend beneath the list.
Billing rates
The rate you set here is the fallback. If a client or project has its own rate, that one is used instead — see the billing rates article for the full order. A rate of 0.00 is the most common reason an invoice comes out empty, so set one when you create the user.
Removing someone
Select them and click Disable. Their historical entries and the invoices those entries sit on remain untouched — they simply cannot sign in and stop appearing in dropdowns. Use the All / Active / Disabled filters to see who is in which state.
Exporting
Export to PDF and Export to CSV produce a copy of the team list. Email lets you message selected users from inside the product.