An invoice in Time Tracker Billing is assembled from entries you have already logged. You pick a client, choose which entries to include, review the total, and save it as a pre-bill.
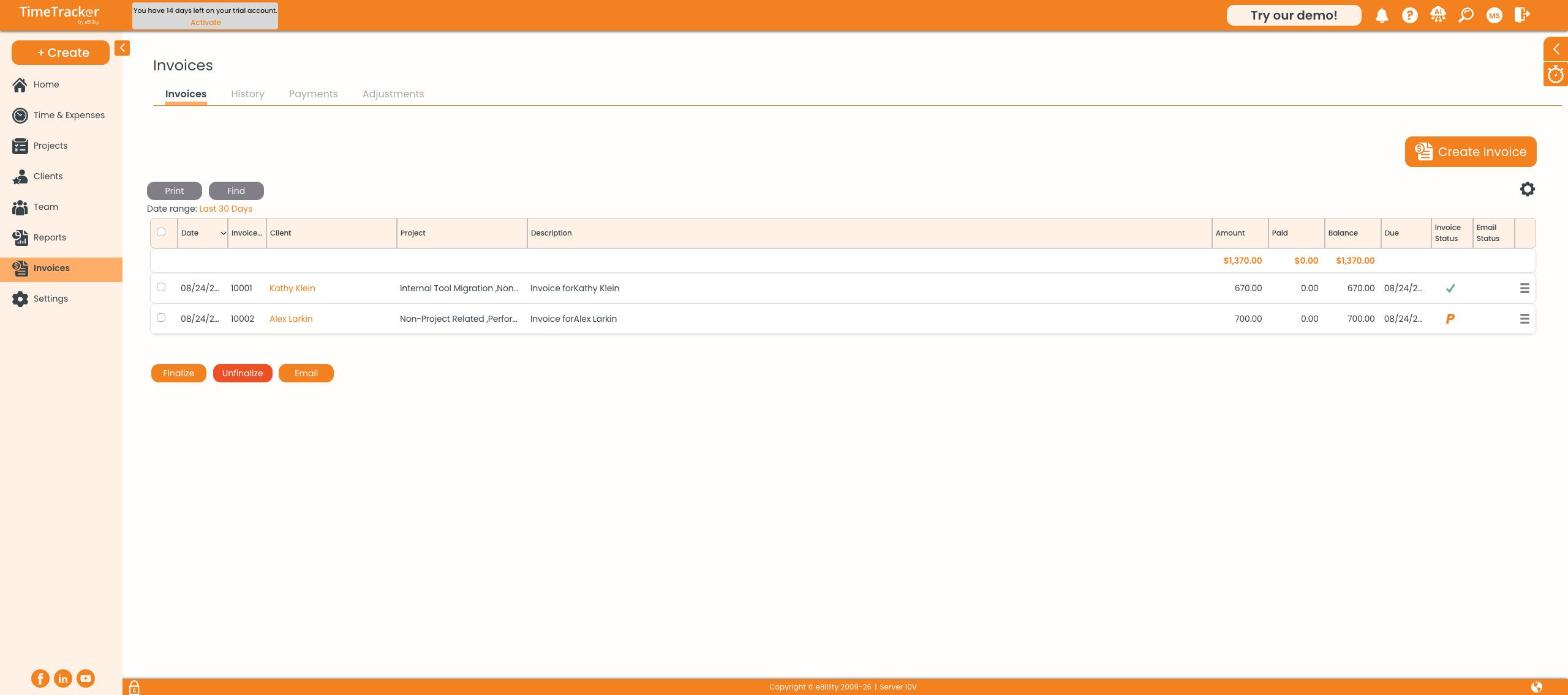
The Invoices page. Each row shows the amount, what has been paid, the balance outstanding, and the invoice's status.
Starting the invoice
- Go to Invoices and click Create Invoice, or use + Create → Invoice.
- Check the Invoice Date. The invoice number stays as TBD until you finalize.
- Choose the Client. Their address and payment terms load automatically.
- Add Notes for Client if you want a message on the invoice, or an Internal Description if the note is only for you.
- Click Select Invoice Entries.
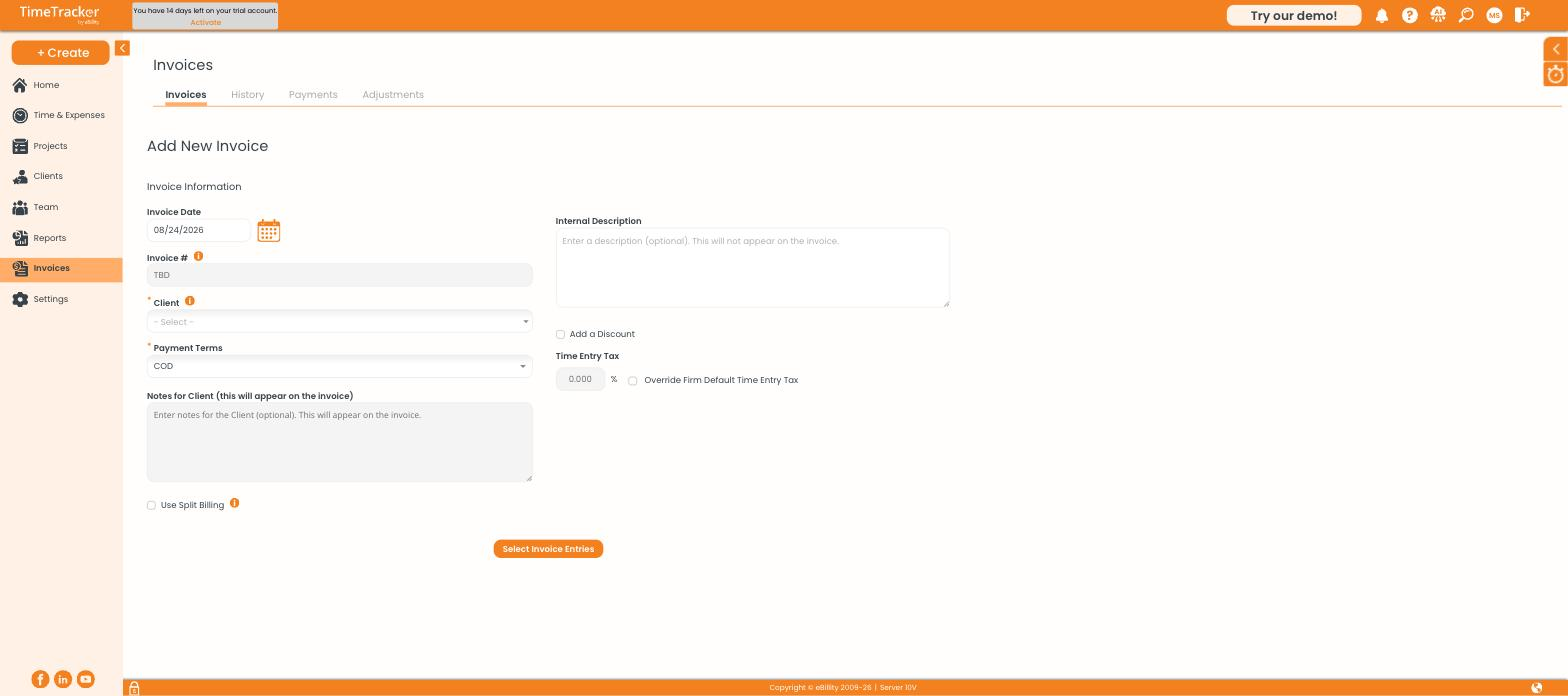
The invoice header, where you set date, client, payment terms, and notes before picking entries.
Choosing what to bill
The entry picker opens beneath the header. Every unbilled time entry and expense for that client appears, grouped by project, with a tickbox on each line.
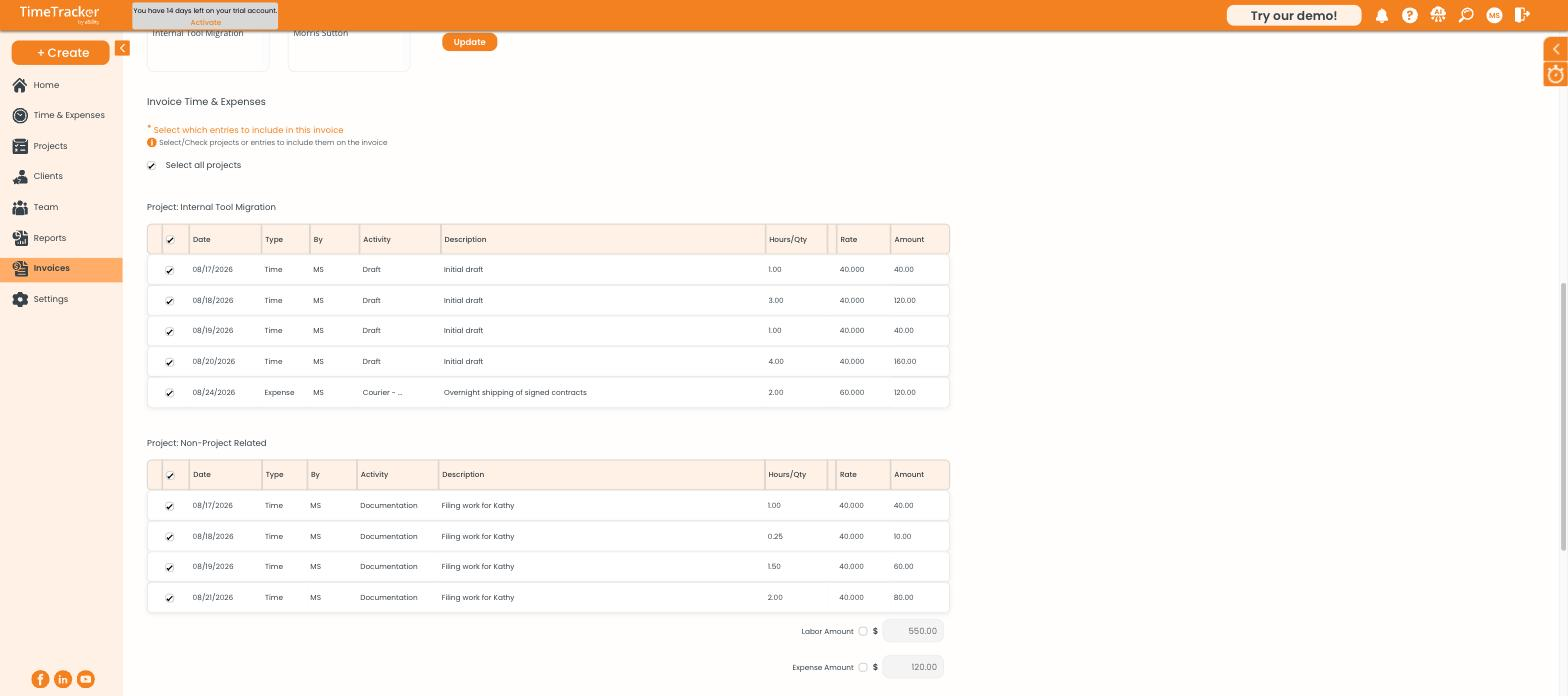
Entries grouped by project, each showing hours, rate, and amount, with expenses listed under their own heading.
- Filter by Project or User using the two list boxes, then click Update.
- Choose All entries up to invoice date or set a Custom date range.
- Use Select all projects to include everything, or untick individual lines to hold them back.
Reviewing the total
Below the entries, Time Tracker Billing totals the invoice for you — total hours, total labour, total expenses, a subtotal, and the invoice amount.
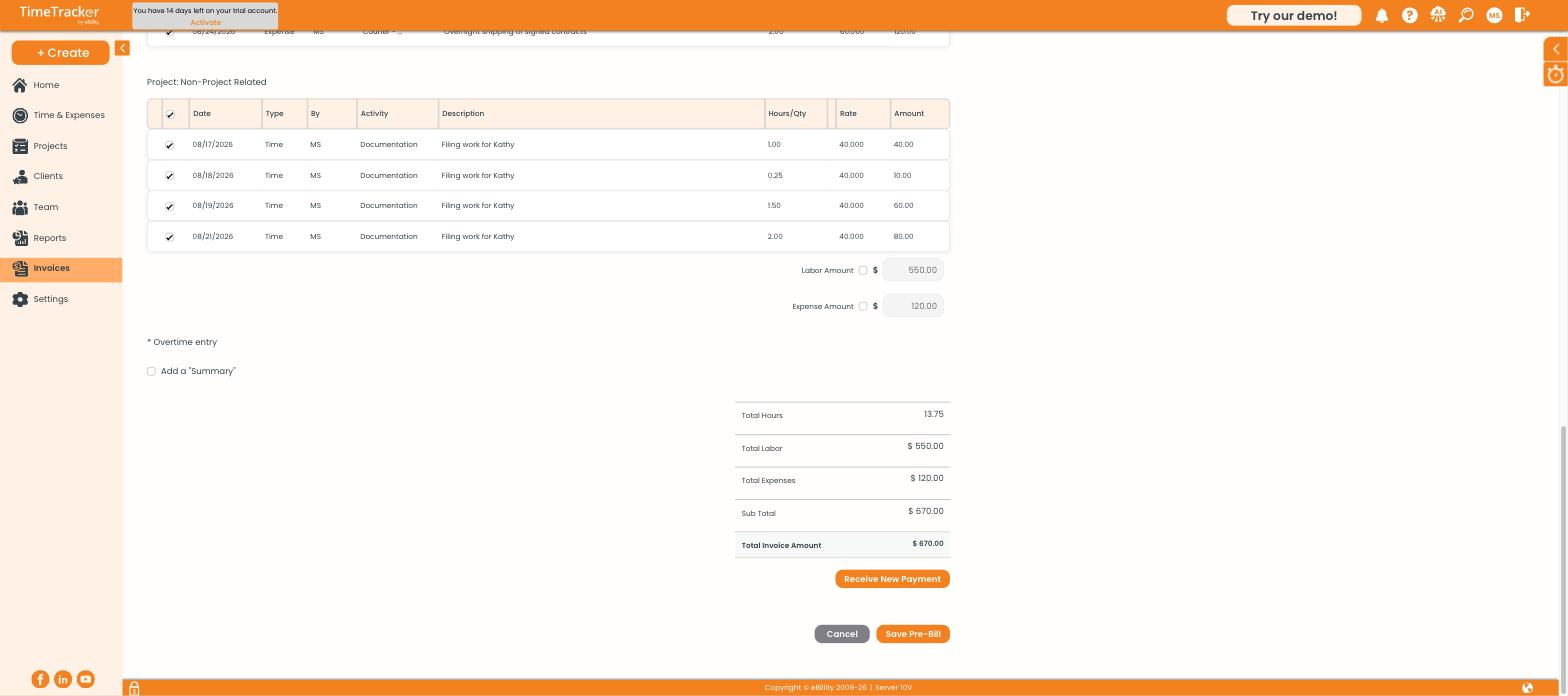
The invoice totals, with the Save Pre-Bill button beneath.
Saving the pre-bill
Click Save Pre-Bill. The invoice is created as a draft, every entry on it moves to Pre-Billed, and it appears in your invoice list with a P in the Invoice Status column.
A pre-bill is still editable. Nothing is locked, no invoice number has been issued, and you can delete it and start again if it is not right.