A project is a named piece of work for one client. Time and expenses attach to it, budgets track against it, and invoices can be grouped by it.
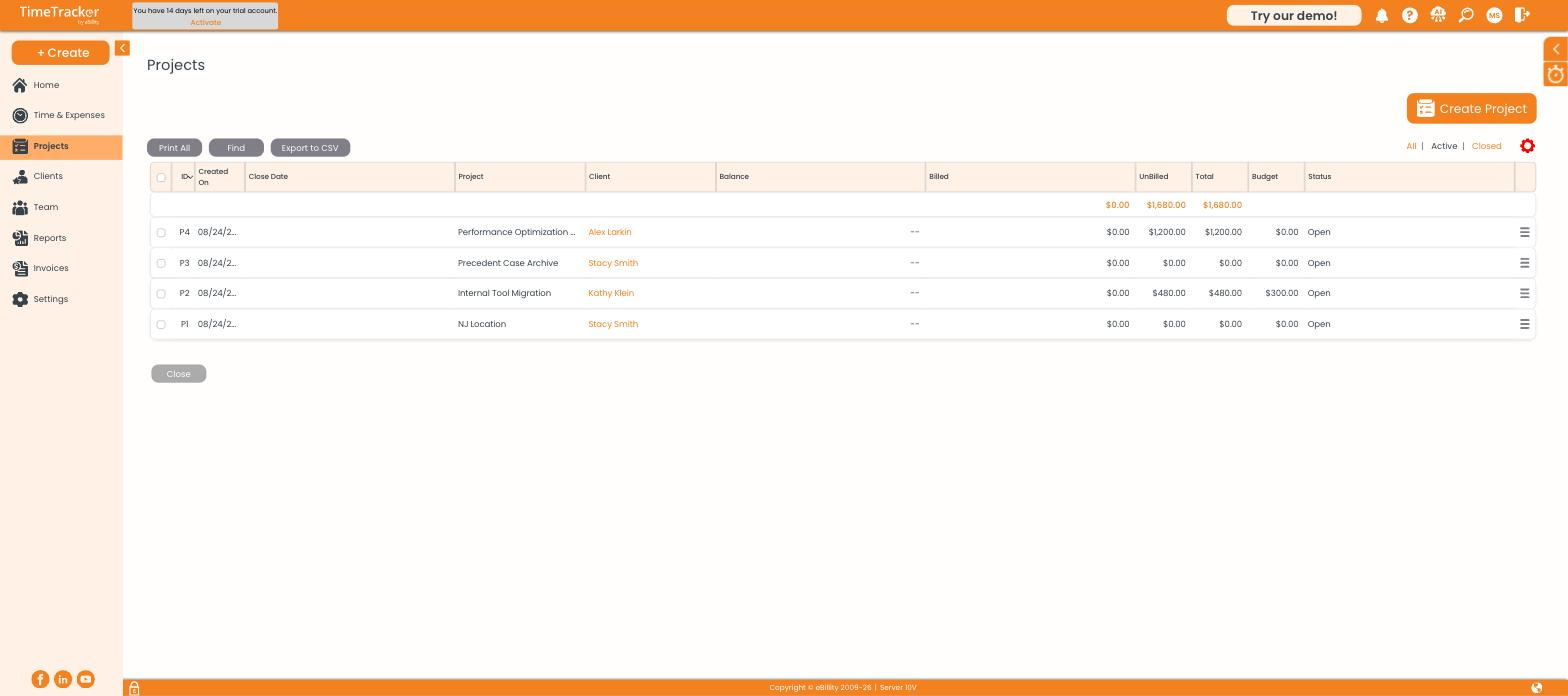
The project list, showing billed, unbilled, budget, and status for every project.
Creating a project
- Go to Projects and click Create Project, or use + Create → Project.
- Pick the Client the project belongs to.
- Give it a Project Name — this appears on the invoice, so make it something the client will recognise.
- Set the Project Status, which starts as Open.
- Move through the Billing, Users, and Project Estimates tabs as needed, then save.
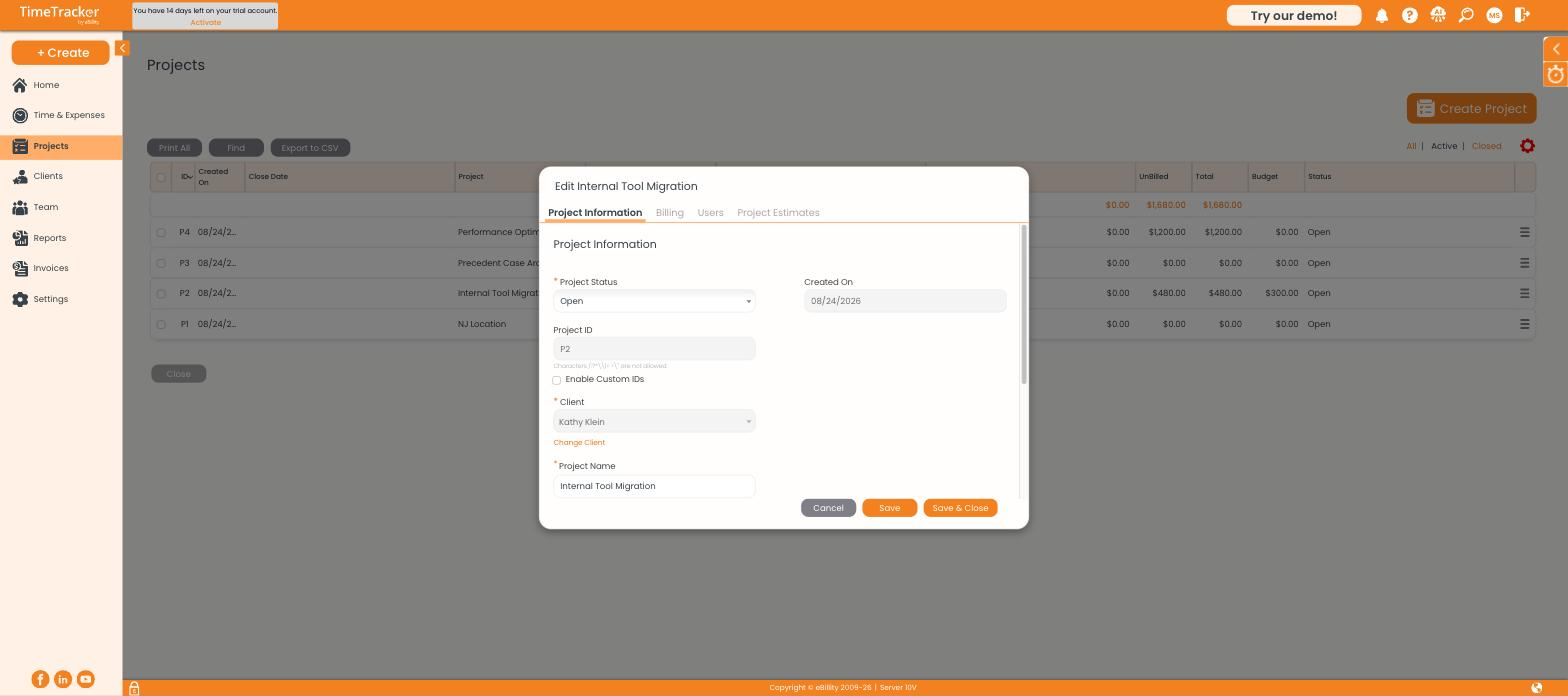
The project record, with tabs for Project Information, Billing, Users, and Project Estimates.
The tabs on a project
Non-project-related time
Not everything fits into a project. A general client call, or scoping work before a project exists, can be logged straight against the client as Non-Project Related. This appears as its own option in the project dropdown.
It is enabled per client on the Other Details tab, and firm-wide at Settings → Timer Settings, where you can also rename the label to something that suits your business.
Closing a project
Select the project in the list and click Close. Closed projects come out of your dropdowns but stay in reports and on past invoices. Use the All / Active / Closed filters to switch views, and Export to CSV if you want the list outside the product.