Drafting an invoice is just the first step — until you finalize it, the entries remain editable and the invoice isn't official. Finalizing locks everything in place, gives the invoice a permanent number, and makes it ready to send to your client.
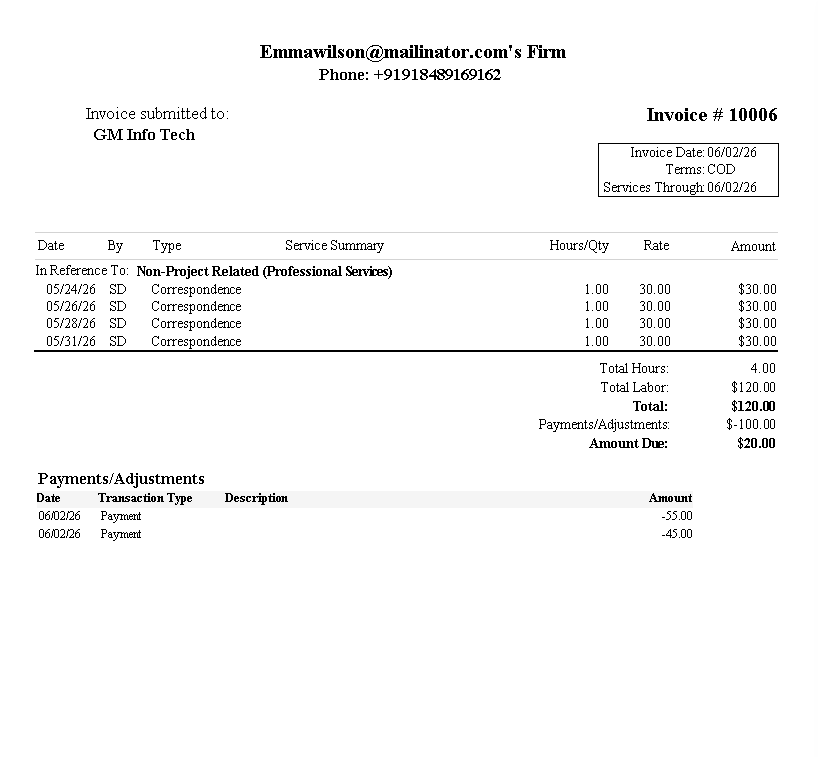
The Invoice Preview shows the rendered invoice with line items, totals, and payment history.
What Happens When You Finalize
- All time entries and expenses on the invoice move from Pre-Billed to Billed status.
- Billed entries are permanently locked — they cannot be edited or moved to a different invoice.
- The invoice is assigned a sequential invoice number.
- The invoice becomes available for sending, printing, or downloading.
How to Finalize
- Open the draft invoice from Billing > Invoices.
- Review the line items, amounts, and client information.
- Click Finalize.
Important: Finalization is permanent. Double-check your invoice before finalizing — once entries are Billed, you cannot un-bill them. If you find an error after finalizing, you'll need to create a billing adjustment.
Sending Options
- Email — Send directly to the client's billing contact. The email includes a link to view and pay the invoice (if online payments are enabled).
- Download PDF — Save a copy for your records or attach it to your own email.
- Print — Generate a print-friendly version for mailing or filing.
- Client Portal — If the Client Portal is enabled, the invoice automatically appears in the client's portal view.