A pre-bill becomes a real invoice when you finalize it. That is the moment an invoice number is issued and the underlying entries lock.
Reviewing before you finalize
From the Invoices list, click the menu at the end of the invoice row and choose View Invoice. You get the invoice exactly as your client will see it.
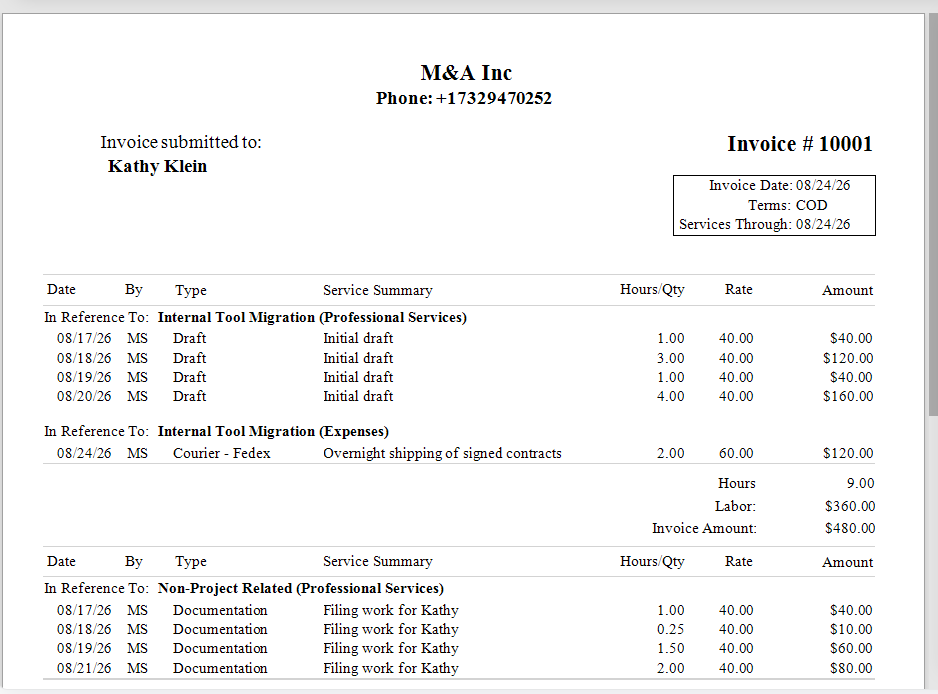
The invoice preview, with entries grouped by project and expenses shown under their own heading.

While an invoice is still a pre-bill, the action bar offers Finalize and Delete Pre-Bill.
Once you finalize, that same bar changes. The badge turns green and reads FINALIZED, Finalize becomes UnFinalize, and Delete Pre-Bill becomes Delete Invoice.

The same invoice after finalizing — the badge reads FINALIZED and the first two buttons have changed.
The actions available
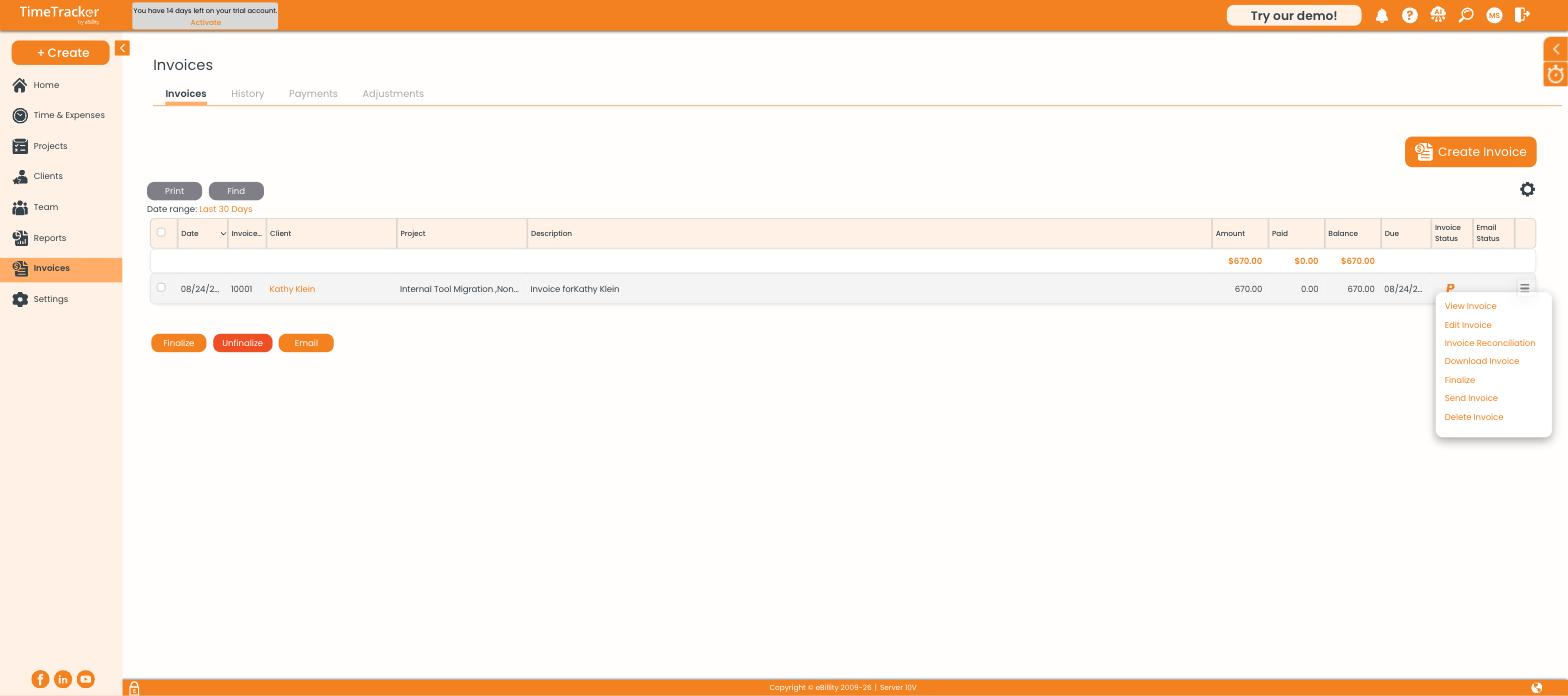
The row menu on the invoice list.
Finalizing
Click Finalize, either from the preview or by selecting the invoice in the list and using the Finalize button. The invoice number replaces TBD, every entry on it becomes Billed, and the row in your invoice list picks up a green tick in the Invoice Status column.
If you need to undo it
Open the invoice and click UnFinalize, or select it in the list and use the Unfinalize button. It returns to pre-bill and its entries unlock. Only do this if the invoice has not gone to the client — otherwise you end up with two versions of the same invoice number in circulation.
Getting it to the client
- Email Invoice sends it from within Time Tracker Billing, using the reply-to address set in your invoice settings.
- Email History shows what was sent and when — useful when a client says they never received it.
- Download Invoice gives you a PDF to attach to your own email.
- Select several invoices in the list and use Email to send them as a batch.