GPS Tracking records employee locations when they clock in and out using the mobile app. Geofencing takes this further by defining specific geographic boundaries where employees are allowed to clock in. Together, these features give you visibility and control over where work is being done.
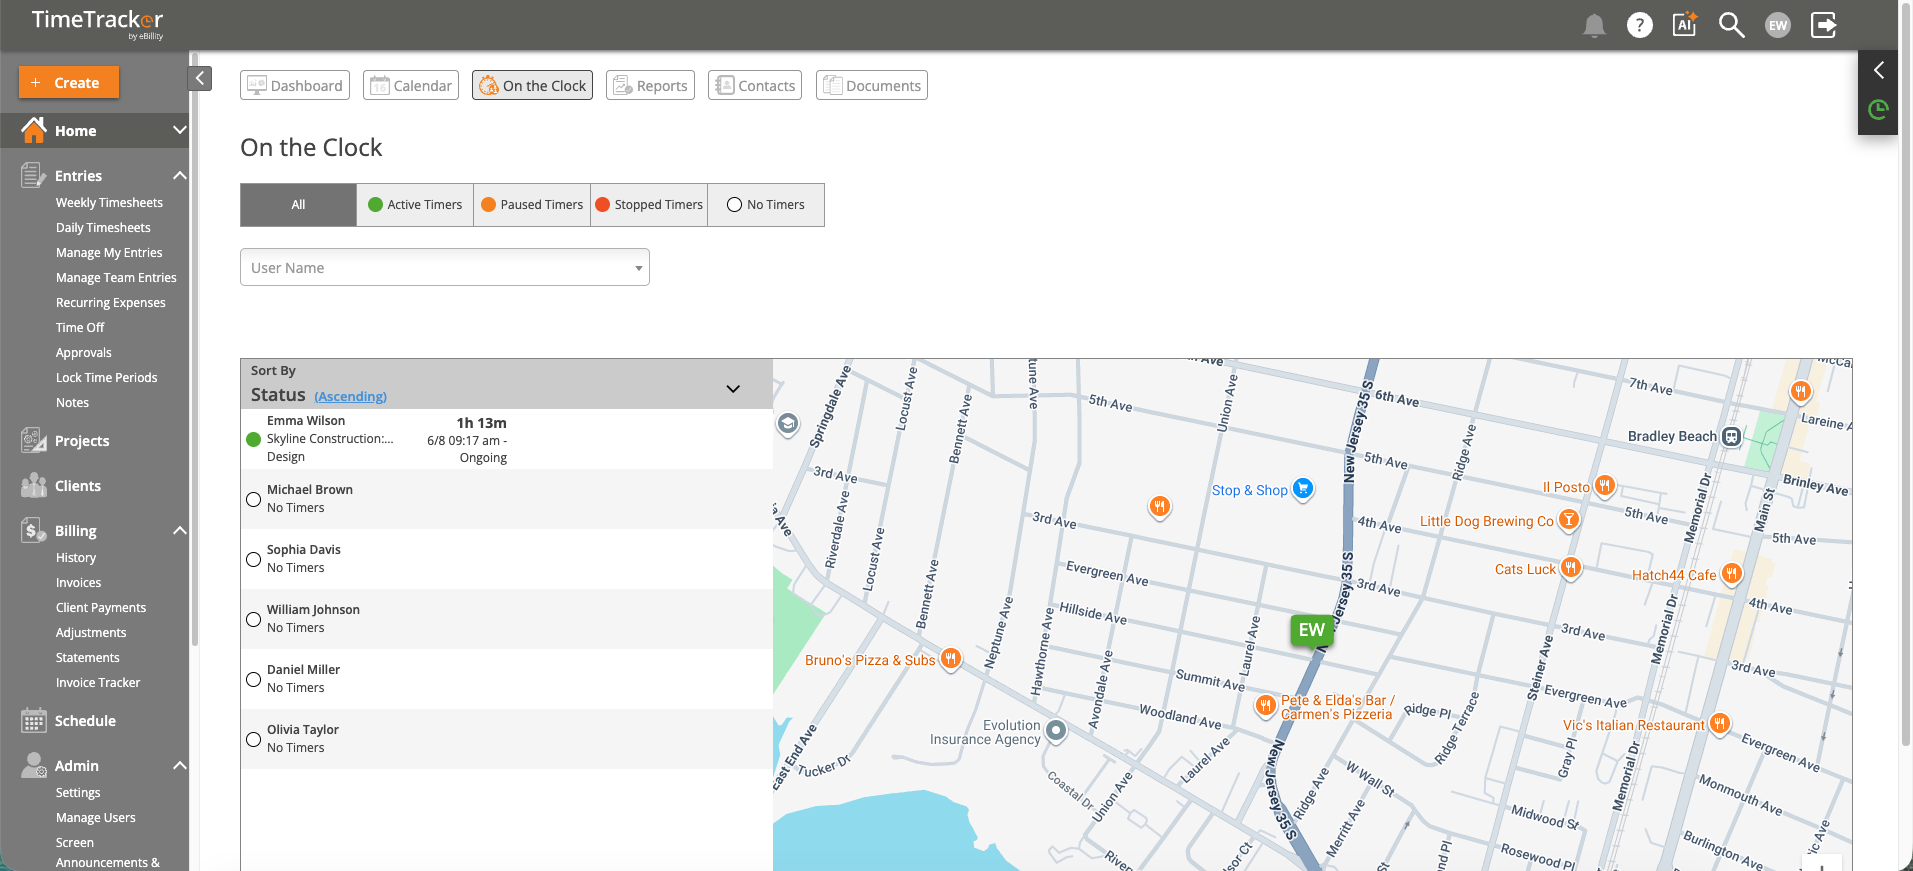
The On the Clock screen shows real-time GPS locations of clocked-in employees on an interactive map.
Setting Up GPS Tracking
- Go to Admin > Settings > GPS Tracking.
- Enable GPS tracking.
- Choose the tracking level:
- Clock-in/clock-out only — Records location at the start and end of each timer. Minimal data collection.
- Continuous tracking — Records location throughout the shift. More data, more visibility.
- Click Save.
GPS data is visible to admins in the GPS Report, on the On the Clock map, and on individual time entries. Employees can see their own GPS data but not others'.
Setting Up Geofences
- Go to Admin > Settings > Geofencing.
- Click Add Geofence.
- Enter the address or drop a pin on the map.
- Set the radius (how far from the center point employees can be and still clock in).
- Name the geofence (e.g., "Main Office", "Client Site - Acme Corp").
- Optionally assign the geofence to specific clients or projects.
What Happens Outside a Geofence
Depending on your settings, when an employee attempts to clock in outside a geofence:
- Flag — The entry is created but marked with a warning for admin review.
- Block — The entry is prevented entirely. The employee must be within the geofence to start a timer.
Requirements: GPS and Geofencing require employees to use the
mobile app with
location services enabled. These features are designed for field service, construction, healthcare, and other industries where on-site presence matters.