Expenses track costs associated with client work — travel, materials, software, meals, and more. When you log expenses in TimeTracker, they can be included on invoices alongside time entries, so the client sees a complete bill.
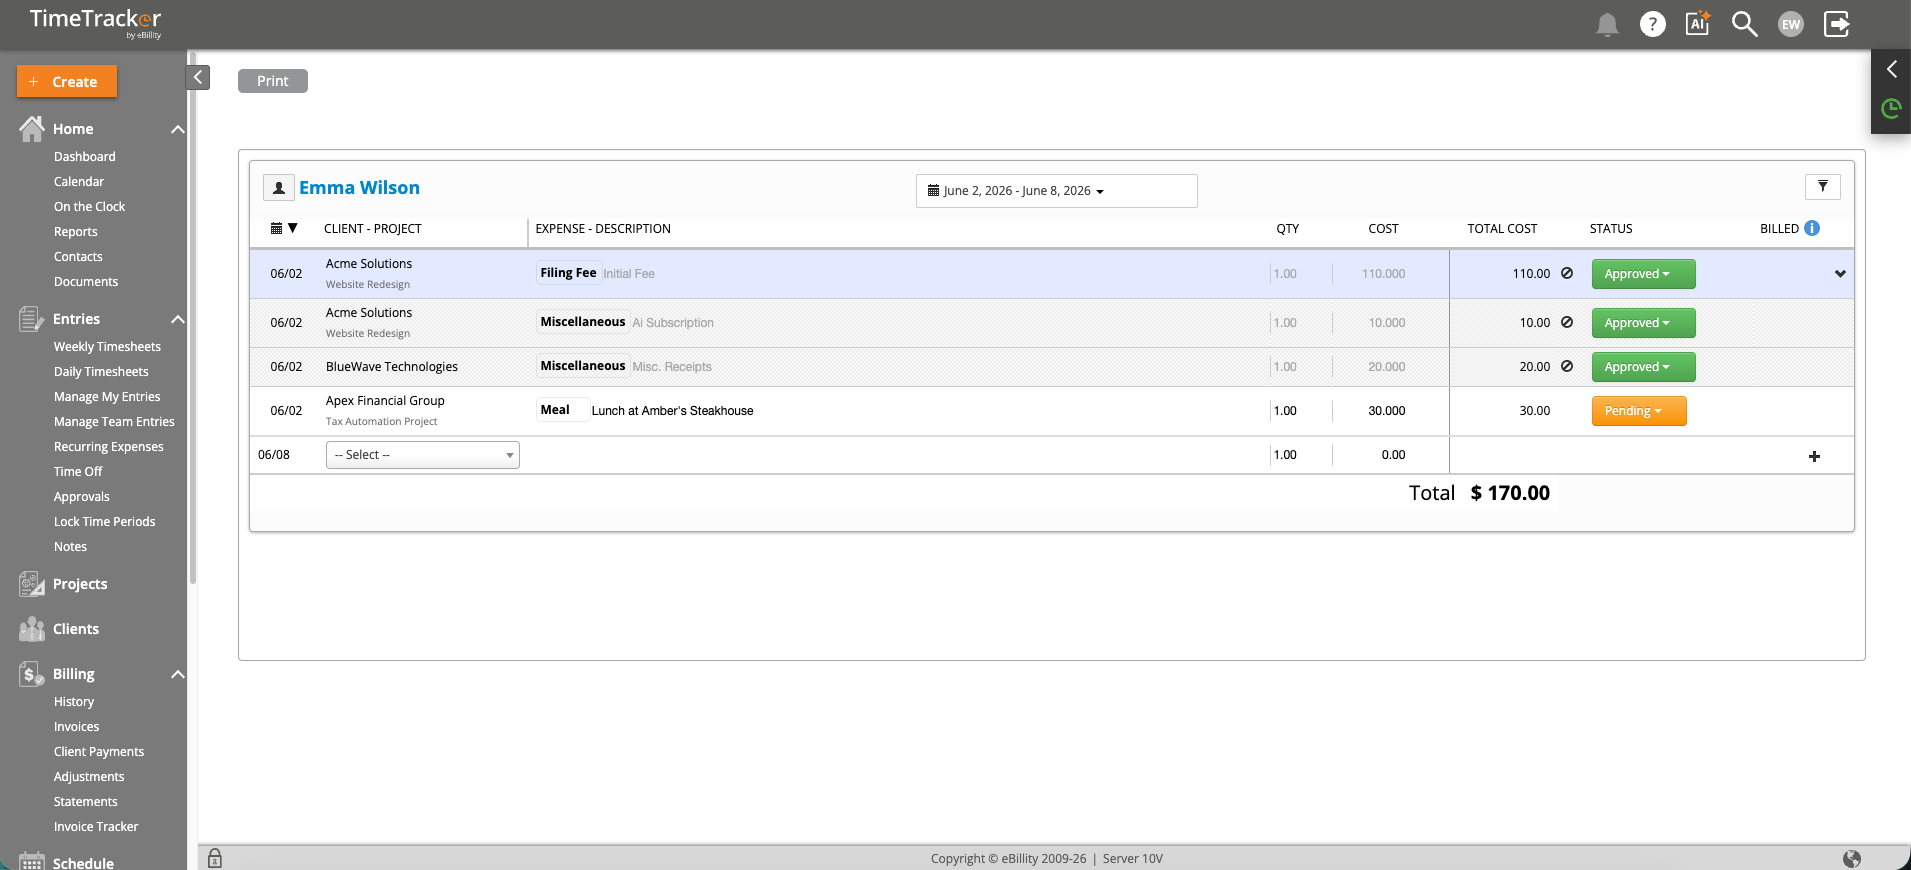
The Expense Entry screen shows expense line items with client-project, description, cost, and approval status.
Entering an Expense
- Click the +Create button and select Expense Entry.
- Select the Client-Project this expense belongs to.
- Choose an Expense-Description category from the dropdown (e.g., Travel, Software, Meals).
- Enter the QTY (quantity) and COST (per unit). The TOTAL COST calculates automatically.
- Expand the row by clicking + for additional fields:
- User — Who incurred the expense (defaults to you)
- Markup Ratio % — Add a surcharge when billing the client
- Reimbursable — Whether the employee should be reimbursed
- Taxable — Whether tax applies on the invoice
- Attachment — Upload a receipt photo or PDF
- Description — Free-text notes about the expense
- Click away to auto-save.
Tip: Expense categories are configured by your administrator under Admin > Custom Lists. If you don't see the right category, ask your admin to add it.
What Happens Next
Expenses follow the same workflow as time entries: if approvals are enabled, expenses are submitted for review. Once approved, they're available for invoicing. When you create an invoice for the client, you can include both time entries and expenses.
Expense tracking is available on the Premium and LawBillity subscription tiers.