Some days are more complex — meetings back to back, multiple projects, detailed notes needed for each. The Daily Timesheet gives you the granularity to capture all of that with exact start and end times rather than just total hours.
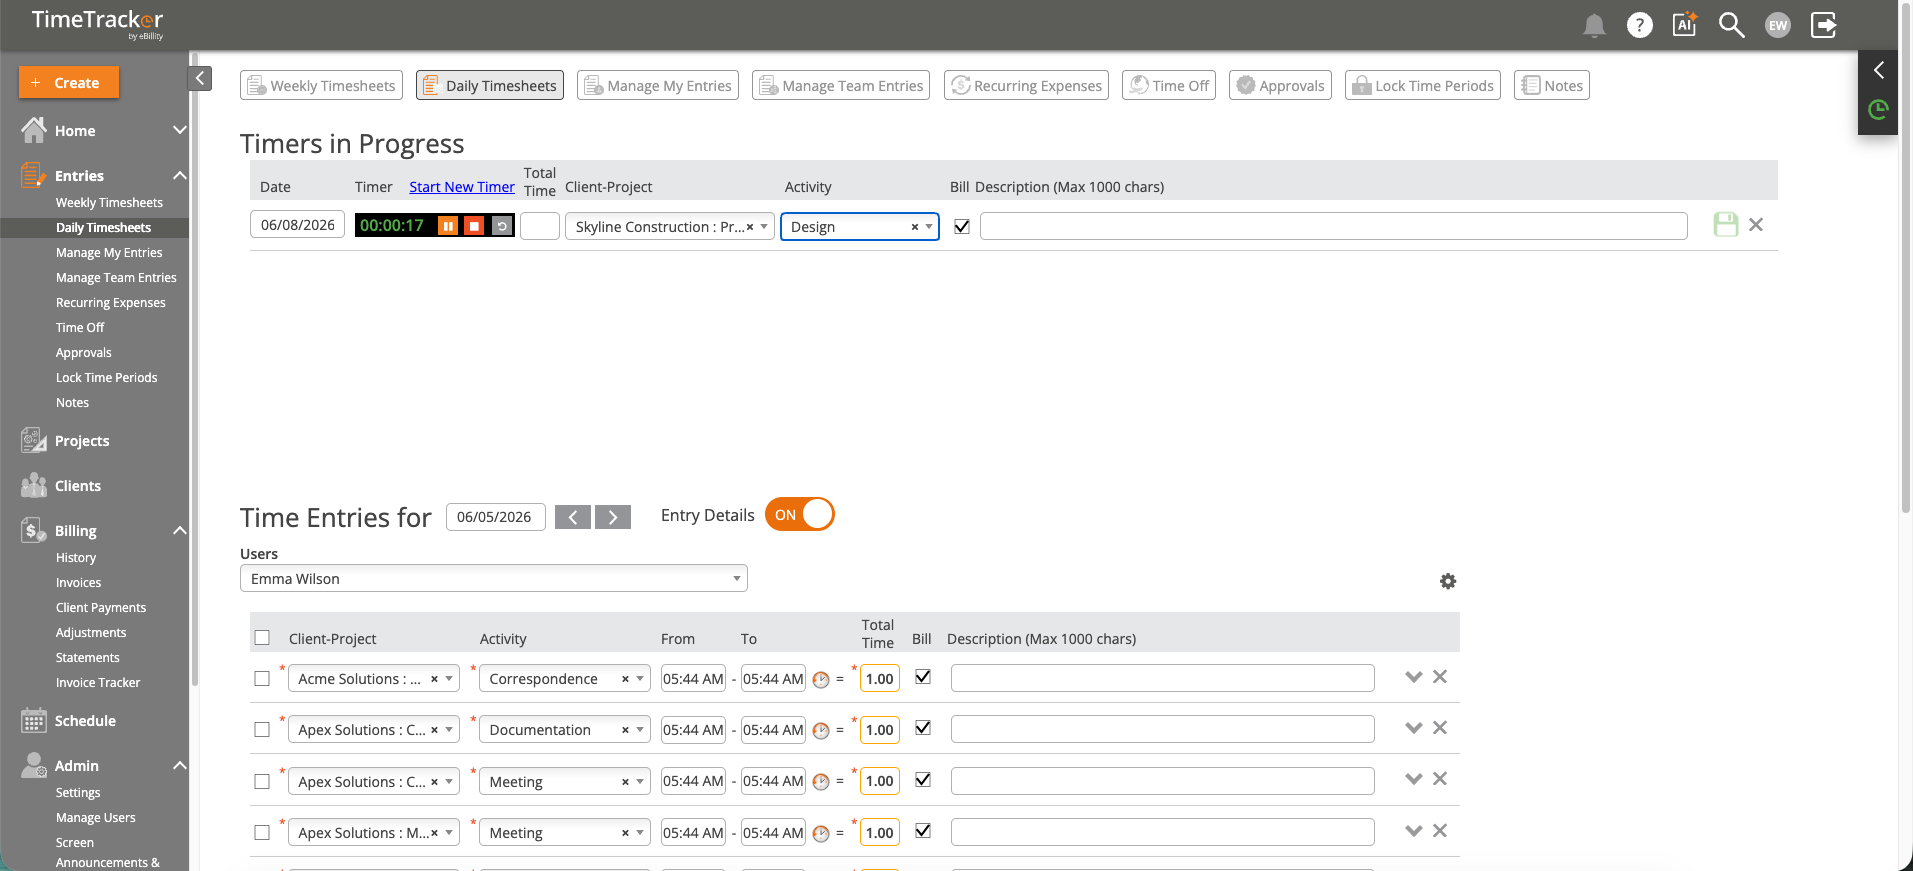
The Daily Timesheets view shows entries for a single day with active timers at the top.
Opening the Daily Timesheet
Click Entries in the left sidebar, then select the Daily Timesheets tab at the top.
Entering a Time Entry
- Select a Client-Project from the dropdown.
- Select an Activity (the type of work performed).
- Enter From and To times. The Total Time auto-calculates.
- Check or uncheck the Bill checkbox to mark the entry as billable or non-billable.
- Add a Description — especially important for billable work that will appear on client invoices.
- Click away to auto-save, or click the Save icon.
Daily vs. Weekly Timesheet
Use the Daily Timesheet when you need start/end times — for example, if your firm bills in specific time increments or needs to track exactly when work was performed. Use the Weekly Timesheet when you just need total hours per day across the week.
Tips
- Use the date arrows at the top to navigate to previous or future days.
- If timers are running, they appear at the top of the Daily Timesheet in the "Timers in Progress" section.
- You can add multiple entries for the same day — one per task, meeting, or client switch.
- If your admin has enabled rounding, your entered times may be adjusted automatically based on the rounding rules.