If you do similar work across a full week, the Weekly Timesheet is the fastest way to log it. You'll see your entire week laid out in a grid, which makes it easy to fill in hours day by day and spot gaps before you submit.
The Weekly Timesheet is the most common way to enter time. It shows an entire week at a glance, with rows for different client-project combinations.
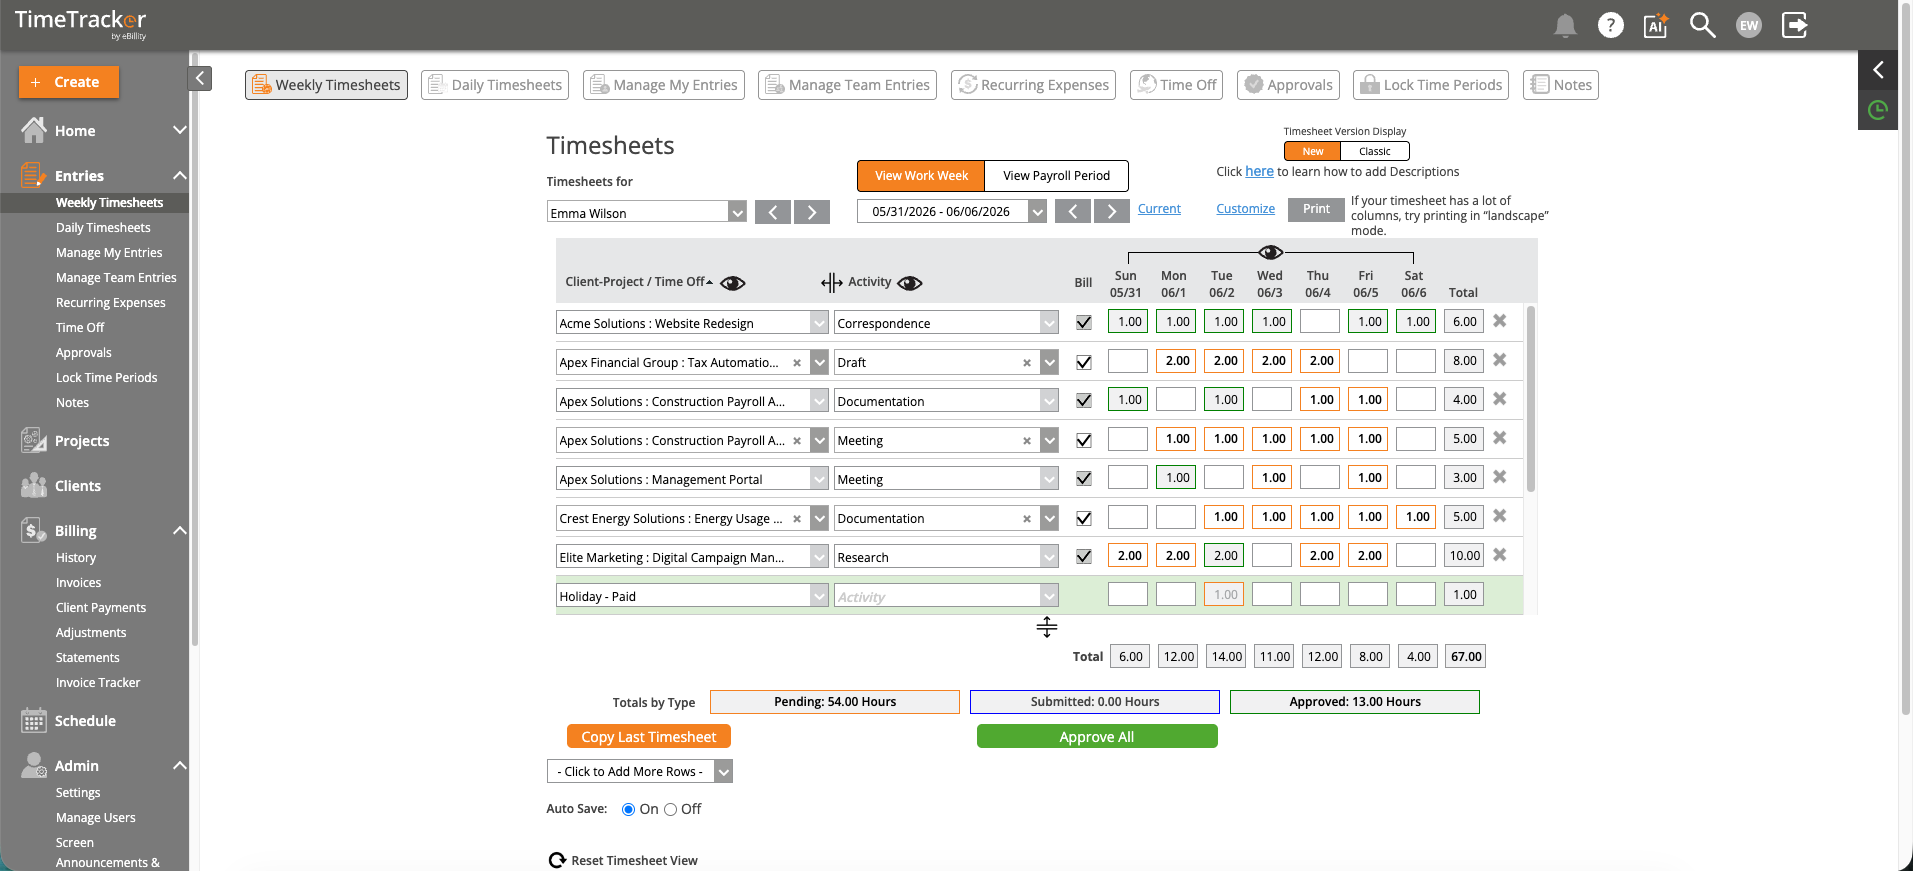
The Weekly Timesheets view lets you enter time across multiple client-projects in a grid format.
Opening the Weekly Timesheet
Click the Entries icon in the left sidebar. The Weekly Timesheet is the default view.
Understanding the Layout
- User Selector — Admins and managers can switch to view other users’ timesheets.
- Week Navigation — Use left/right arrows to move between weeks. “Current” jumps to the current week.
- View Toggles — Switch between “View Work Week” and “View Payroll Period.”
- Column Headers — Client-Project, Activity, Bill (checkbox), one column per day (Sun–Sat), and Total.
Entering Time Step by Step
- Select a Client-Project: Click the dropdown in any row. A searchable list shows all available client-project combinations you have access to.
- Select an Activity: The activities available depend on the Activity Group assigned to that client or project (e.g., “Consulting,” “Design,” “Meeting”).
- Enter Hours: Click the cell for the desired day and type hours in decimal format (e.g., “2” for two hours, “3.5” for three and a half hours).
- Set Billable Status: The Bill checkbox is checked by default if your firm’s default is Billable. Uncheck it to mark the entry as non-billable.
Adding Descriptions
Click on a cell that has hours. A Description text area appears below the grid where you can type up to 1,000 characters describing the work performed. Descriptions can appear on invoices.
Auto-Save
By default, auto-save is ON (toggle at the bottom of the page). When you click away from a cell, your entry saves automatically. A brief “Saving...” indicator appears. If auto-save is off, click the Save button manually.
Totals Bar
The bottom of the timesheet shows daily totals, row totals, and a grand total. Three color-coded bars indicate hours by billing status: UnBilled (orange), Pre-Billed (blue), and Billed (green).