When you want to know exactly how long a task takes — not an estimate, not a rounded number — use a timer. It runs in the background while you work, so you get precise records without the guesswork.
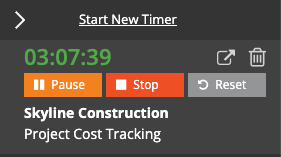
The Timer controls show elapsed time with Pause, Stop, and Reset buttons, plus the assigned client-project.
Starting a Timer
- Open the Daily Timesheet (Entries > Daily Timesheets).
- Click "Start New Timer" in the Timers in Progress section at the top.
- A running clock begins counting up in real time.
- You can also start a timer from the Chrome Extension, Outlook Add-in, or mobile app.
Timer Controls
- Pause — Temporarily stops the clock (e.g., for a break or interruption). Click again to resume.
- Stop — Stops the timer completely. You can then review and edit the details before saving.
- Reset — Clears the timer and starts over from zero. Use this if you started a timer by mistake.
Saving a Timer
- Stop the timer.
- Fill in the Client-Project, Activity, and Bill checkbox.
- Add a Description if needed (recommended for billable work).
- Click the Save icon. The timer converts to a time entry on your timesheet.
Multiple Timers
You can have multiple timers open, but only one can be actively counting at a time. Starting a new timer automatically pauses the current one. This makes it easy to switch between tasks — start a timer for the new task, and the old one pauses. Switch back by clicking play on the paused timer.
When to Use Timers vs. Manual Entry
- Timers — Best for task-switching, meetings, and work where you want exact duration. Great for people who forget to log time at the end of the day.
- Manual entry — Best when you know the hours in advance (e.g., a fixed 2-hour block) or when entering time retroactively.