When employees submit time off requests, admins and managers review and act on them from the Time Off page. This guide covers the approval workflow, entering time off on behalf of employees, and tracking balances.
Reviewing and Approving Requests
- Click Time Off in the left sidebar (under Entries).
- The Time Off list shows all requests across your team. Pending requests need your attention.
- Click on a pending request to view its details — employee name, dates, hours, time off code, and any notes.
- Click Approve or Reject.
Approved time off is automatically added to the employee's timesheet for the relevant dates. The Action Taken column records who approved or rejected each request and when.
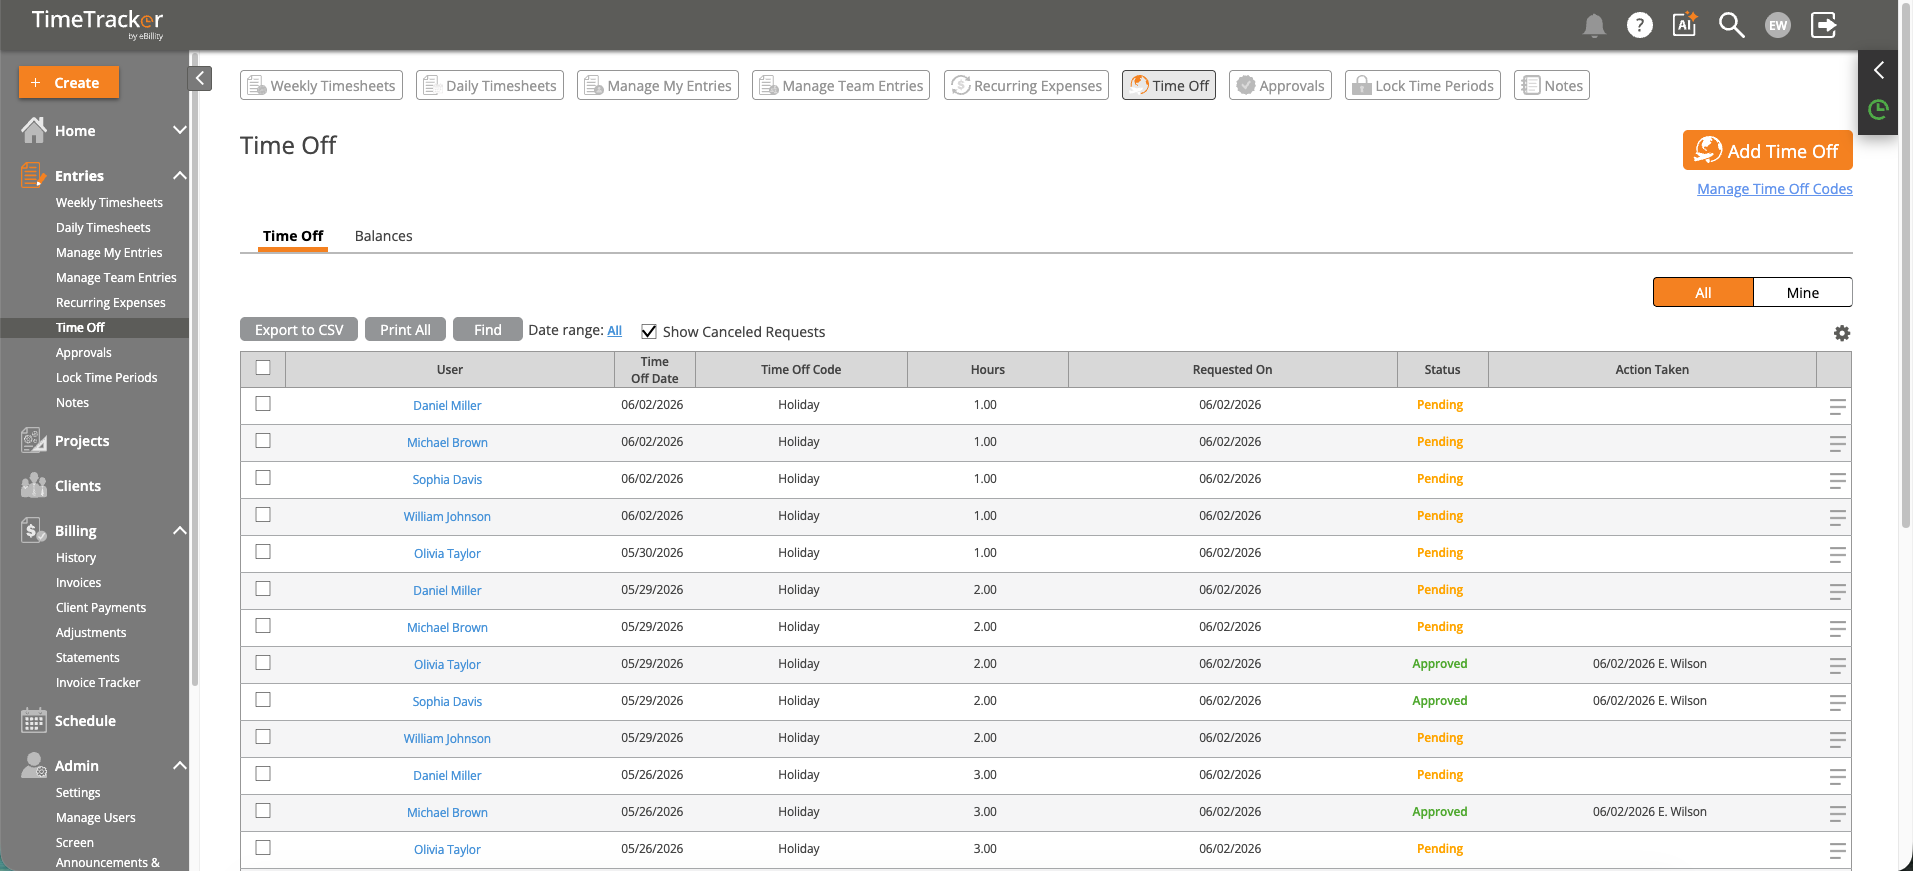
The Time Off list gives managers a full view of all pending, approved, and cancelled requests.
Entering Time Off on Behalf of an Employee
Sometimes you need to enter time off for someone — maybe they're already out, or they don't have system access. Click Add Time Off, select the user(s), fill in the time off code, dates, hours, and optional description, then click Save.
Tracking Balances
Click the Balances tab to view each employee's remaining accrued time off, broken down by code (vacation, sick, personal, etc.). This is especially useful before approving a large block of time off — you can verify the employee has sufficient balance.
Export and Print
- Export to CSV — Download the time off list as a spreadsheet for payroll processing or external reporting.
- Print — Print the current filtered view for physical records.