Expenses sit alongside time on your invoices. A courier fee, a filing charge, a subscription bought for a client — anything you spend on their behalf can be logged and billed.
Creating an expense
- Choose + Create → Expense Entry, or click Create Expense Entry on the Manage Time & Expense Entries page.
- Check the User and Date.
- Pick the Client, then the Project.
- Choose an Expense Type from the list.
- Write a Description — this is what the client reads on the invoice, so be specific.
- Enter Cost, Quantity, and a Markup Ratio if you apply one.
- Tick Reimbursable and Taxable as appropriate.
- Attach the receipt, then Save.
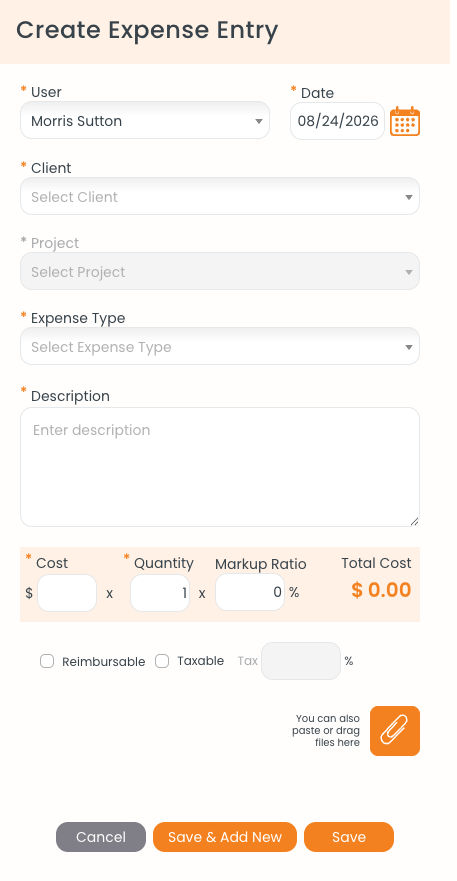
The Create Expense Entry form, with cost, quantity, and markup along the highlighted row.
Attaching a receipt
The paperclip at the bottom of the form opens a file picker, and you can also paste or drag files straight onto that area. Attaching the receipt at the moment you create the expense is far easier than reconstructing it at month end.
Expense types
The Expense Type list is yours to shape. Go to Settings → Customize → Custom Lists and use Add Expense. Each type can carry a default amount, a tax percentage, and a reimbursable flag, which saves typing on costs you log repeatedly.
Where the expense goes next
A saved expense joins your entries list as an UnBilled item. When you next build an invoice for that client, it appears in the entry picker alongside the time entries, under an (Expenses) heading for its project.