Every report in Time Tracker Billing works the same way: pick the report on the left, set your filters in the middle, and generate. Learn it once and all nineteen behave alike.
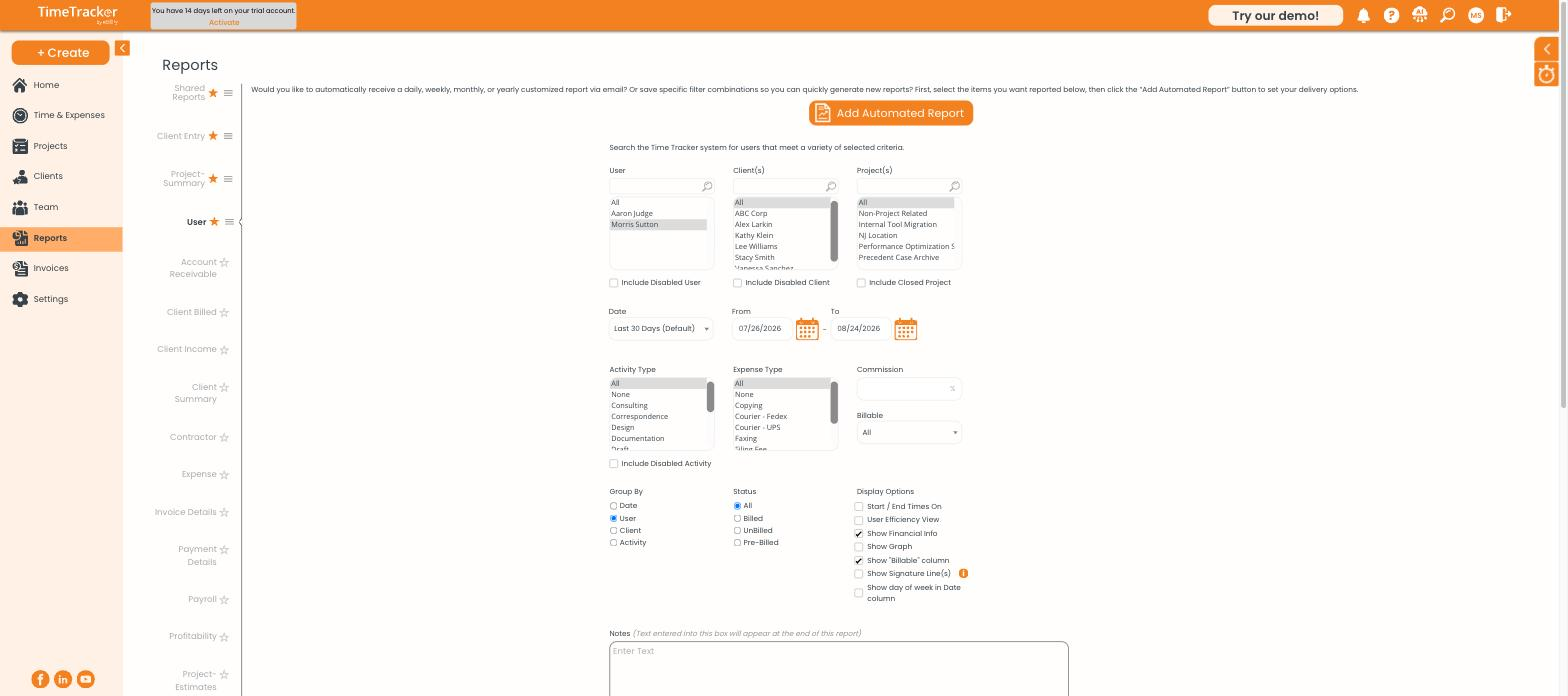
The reports page — report list on the left, filters in the centre.
Running one
- Go to Reports and choose a report from the list on the left.
- Narrow by User, Client, and Project using the three list boxes.
- Set the Date range — it defaults to the last 30 days.
- Filter by Activity Type, Expense Type, or Billable status if you need to.
- Choose how to Group By — Date, User, Client, or Activity.
- Pick a Status: All, Billed, UnBilled, or Pre-Billed.
- Click Generate Report.
Display options
The options on the right change what the output contains:
- Start / End Times On — include the From and To times on each entry
- User Efficiency View — reframe the output around productivity
- Show Financial Info — include rates and amounts
- Show Graph — add a chart above the figures
- Show "Billable" column — mark which entries are billable
- Show Signature Line(s) — add space for signing, for reports a client must approve
- Show day of week in Date column — helpful on timesheet-style reports
Anything you type into Notes appears at the end of the generated report.
Reading and exporting
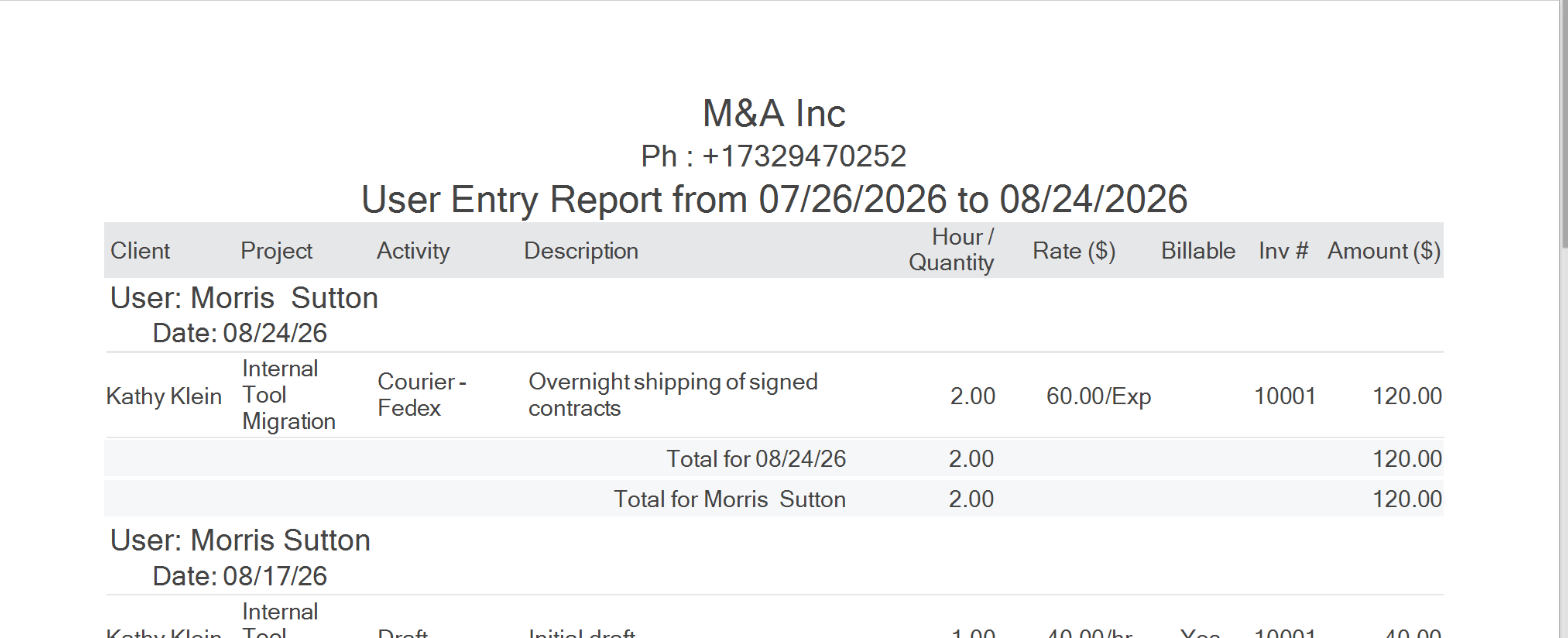
A generated User Entry Report, grouped by user and date with subtotals throughout.
The report appears below the filters with page controls, zoom, search, print, and download. Export To CSV gives you the underlying data for a spreadsheet.
Automated reports
Add Automated Report at the top of the page turns your current filter set into a scheduled email — daily, weekly, monthly, or yearly. Set the filters first, check the output is what you want, then schedule it.