The weekly timesheet is a grid. Each row is one client-project-activity combination, and each column is a day of the week. If you work on the same handful of things all week, this is the fastest way to log it.
Go to Time & Expenses, then make sure the Weekly Timesheet toggle is selected.
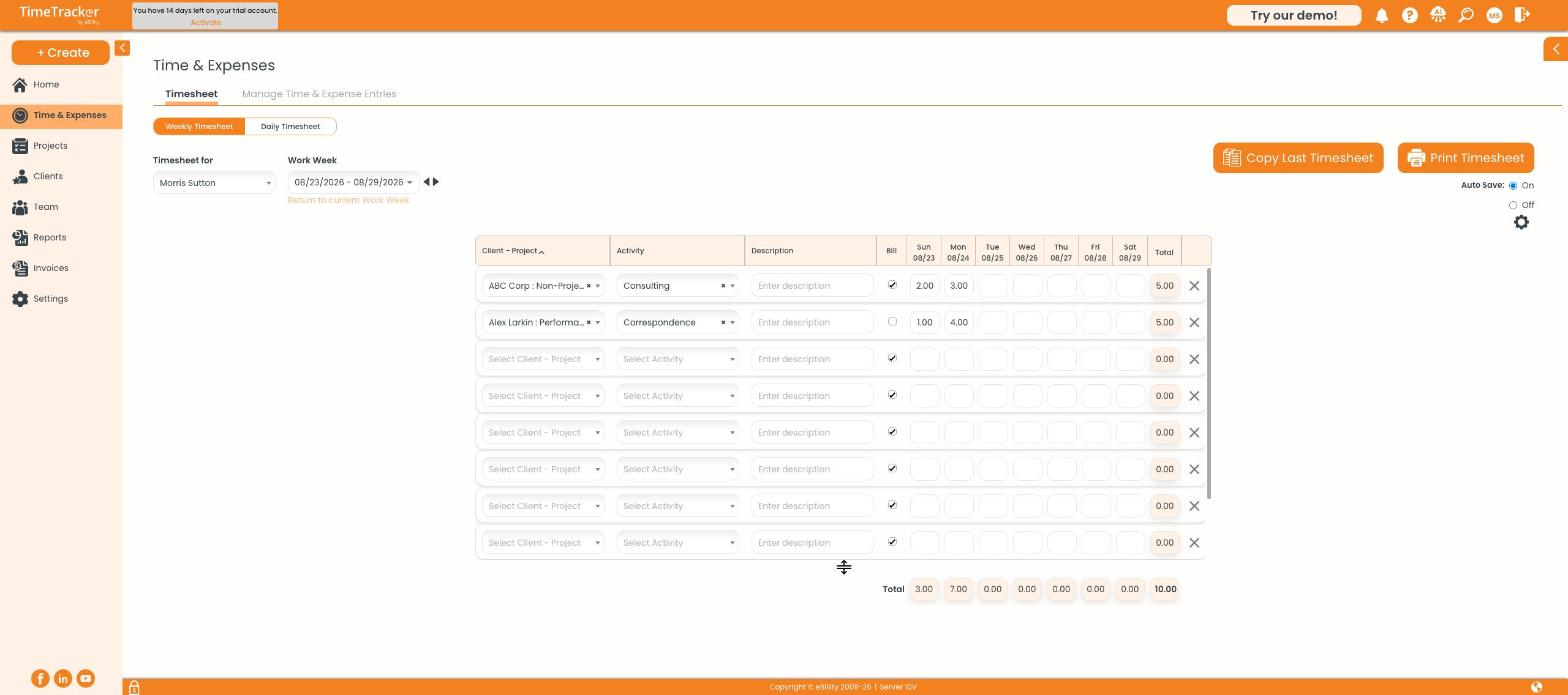
The weekly timesheet grid, with one row per client-project and one column per day.
Adding a row
- Click Select Client - Project on an empty row and choose from the list.
- Choose an Activity — this describes the kind of work, such as Consulting or Design.
- Type a Description if you want the detail to appear on the invoice.
- Leave the Bill checkbox ticked if the time is billable to the client, or untick it if it is not.
- Type your hours into the day columns.
How to type hours
Enter hours as a decimal, so 2.5 means two and a half hours. Your row total updates as you type, and the totals bar along the bottom shows a total for each day and a grand total for the week.
Auto Save
The Auto Save toggle in the top right is set to On by default, so your entries save as you go. If you prefer to review before committing, switch it to Off and save manually.
Copy Last Timesheet
If your week looks much like last week, click Copy Last Timesheet. It brings across the structure — your client-project selections, activities, and billable flags — so you only have to fill in the hours.
Print Timesheet
Print Timesheet produces a clean printable copy of the week, useful if a client wants a signed record of hours.