A timer counts your time while you work, so you are not reconstructing your day from memory afterwards. Timers live on the daily timesheet.
Starting a timer
- Go to Time & Expenses and switch to the Daily Timesheet.
- Click Start New Timer next to the Timers in Progress heading. The clock begins immediately.
- Choose your Client-Project and Activity while it runs — you do not have to set these up front.
- Add a description so you remember what the block was for.
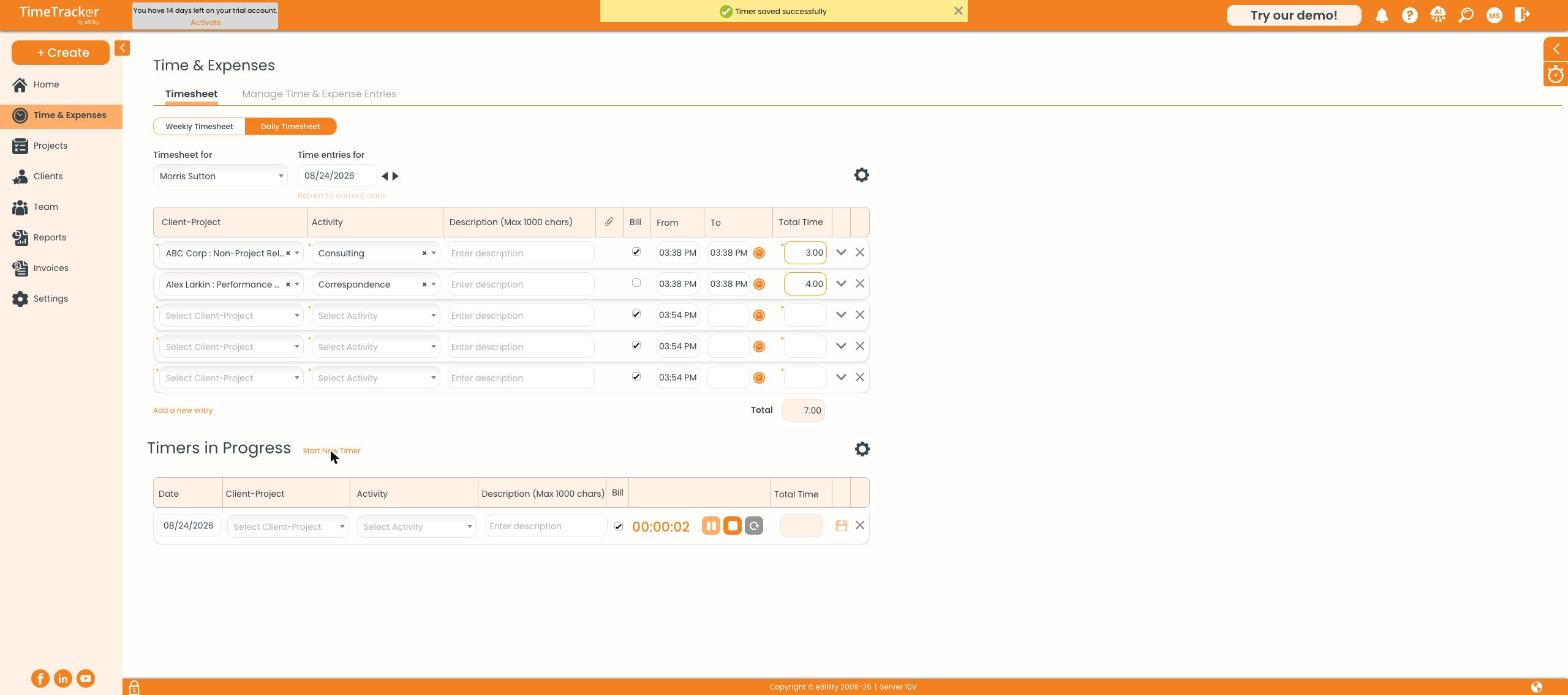
A new timer begins counting the moment you click Start New Timer — you can fill in the details afterwards.
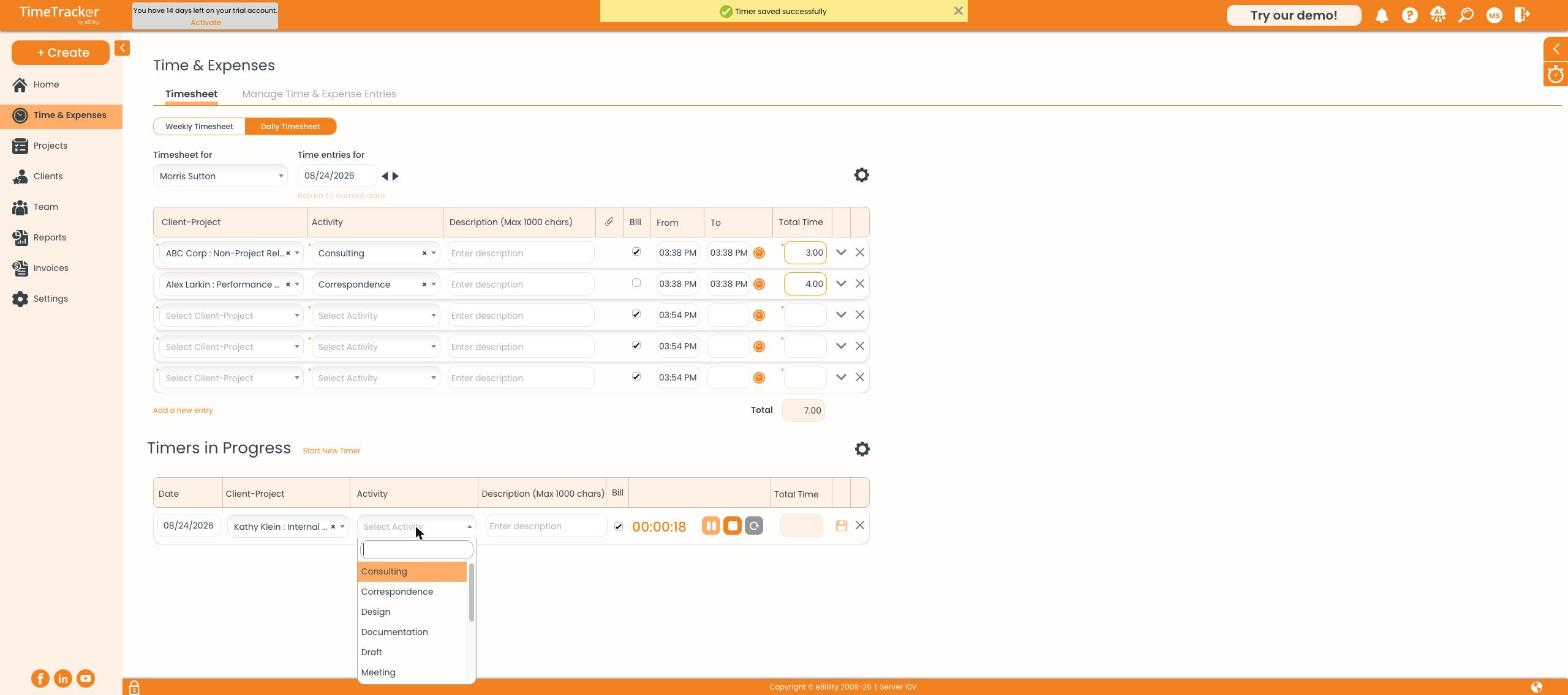
Choosing an activity for the running timer. The clock keeps counting while you do.
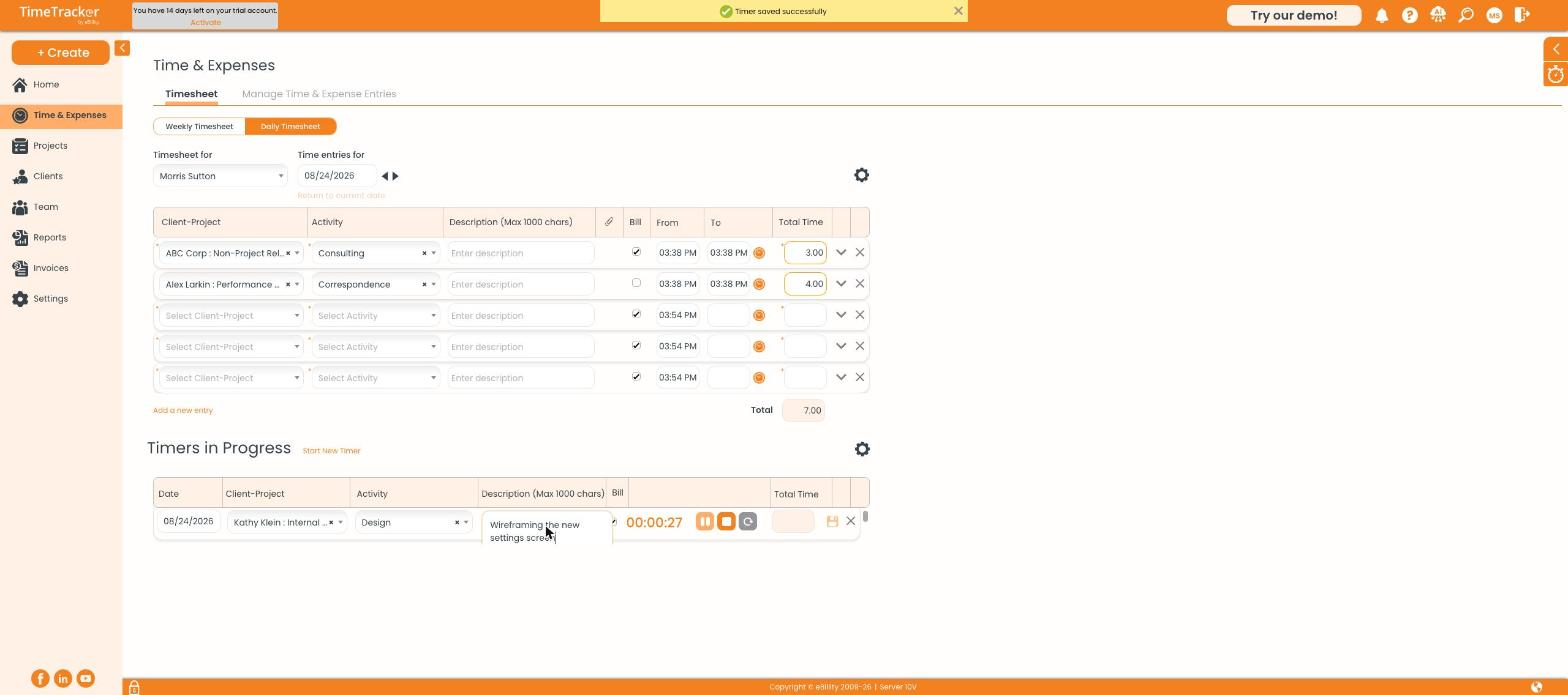
A running timer with the client, project, activity, and description filled in.
The timer controls

The three timer buttons — pause, stop, and reset — sit beside the running clock, with a save icon to the right.
Running more than one timer
By default you can only run one timer at a time — starting a new one stops the current one. An administrator can change this at Settings → Timer Settings under Concurrent Timers.
Rounding
If your firm has set timer rounding, the saved entry is rounded when you save it. For example, with rounding set to five minutes, a two-minute timer saves as five minutes and a twelve-minute timer saves as fifteen. This is configured at Settings → Timer Settings.